We have a workflow to help you create a new User in Lentune.
You can use the new workflow to create a new user. To enable this, you must have the appropriate Security Role set up to use this process. Please contract support@lentune.com if you need us to help.
Let's look at the new process...
- Start at Settings > User and click Create new user.
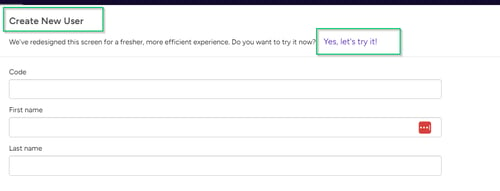
This brings up the Create New User window, and allows you the option to use the new method.
-
Click Yes, let's try it to get started. This takes you to the first step.
-
At Step 1, enter the First and Last Name, User Code, Email address and optionally, Job Title, then click Next to go to the next step.
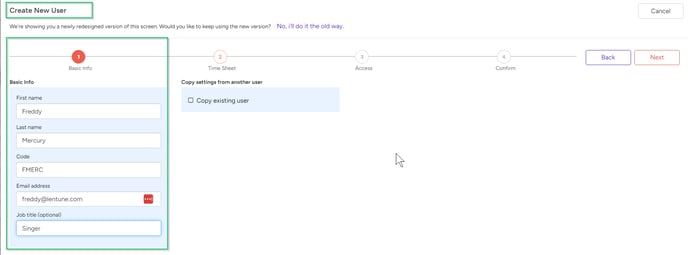
Copy Settings: You can tick the option Copy existing user and select another User to duplicate their copy settings. This will copy the Time sheet settings, Security Groups and Roles and Access Personas from the selected User to your new User. This makes the process very efficient to create new Users who will have similar job titles or roles within your organisation and therefore require similar settings.

Tip: At any stage you can click Next or Back, or click on the Step number in the circle at the top of the screen to go to the next or previous step.
- Step 2, if the new user will be a Time sheet user, click Yes, and select the Time sheet user details required for this person.
- If they are not a Time sheet user, click No. Then click Next or move to Step 3.

Step 3 is to apply Access and Security. There must be a Default Access Persona selected and assigned to a Company, Branch or Project. If you have copied from an existing User, then the Default Access Persona will also be copied from that User to the new User, as well as its apply details; (i.e. Company, Branch, Project.)
All Access Personas and Security Groups and Roles will be copied if you have selected a User to copy from. A list of the Access Personas that will be copied is displayed. In the Confirm Access Personas window:
- You can opt to Keep these Access Personas, or Replace them.
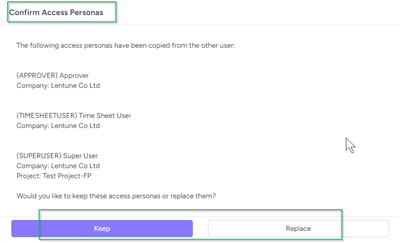
If you click Keep, then all details will be copied to the new User.
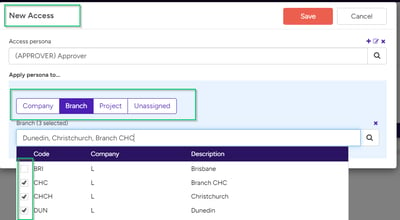
If you opt to Replace them, or you have not copied details from an existing User, then you must assign Access Personas now. To apply new Access Personas:
- In the New Access window, select an Access persona and apply it to the required Company, Branches or Projects by ticking the codes you want from the dropdown list, and then click Save.
-
Click Apply Persona if you need to add more Access Personas.
-
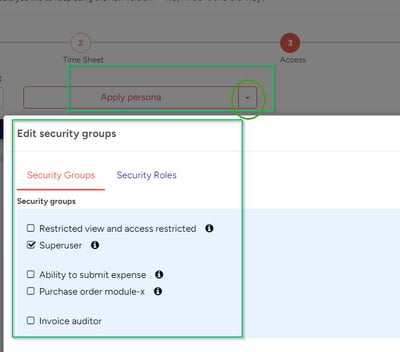
Alternatively, click the down arrow beside Apply Persona to Edit the Security Groups for the new User, and select any of your existing Security Groups that you want to assign to this User.
-
Click Save, then click Next to move to the Confirm step.
- Step 4 is to send an invitation email to the new User, by ticking the field for Send email invite to UserName, and then click Create.

If you have ticked Send email to the user, they will receive an email with the link to the Lentune system, where they can click on the link in the email Join Lentune to go to the Reset Password to set up their own password. They can then login.
Need more help? We’re here! We hope our article was helpful! If you need more info or want to connect, drop us an email at support@lentune.com.
Thank you. We love to hear from you!
Last updated: 9 September 2024
