You can set a Branch (or multiple Branches) as the default to display on the Invoice Dashboard. This can be done either system wide or for the logged in User only.
Introduction
You are able to set various default settings, including Branch selection, as the default for displaying invoices for approval on the Invoice Dashboard.
This can be set globally for all Users, or individual Users are able to set their own defaults, where the Administrator has allowed this to be done.
Set the Personalised defaults flag
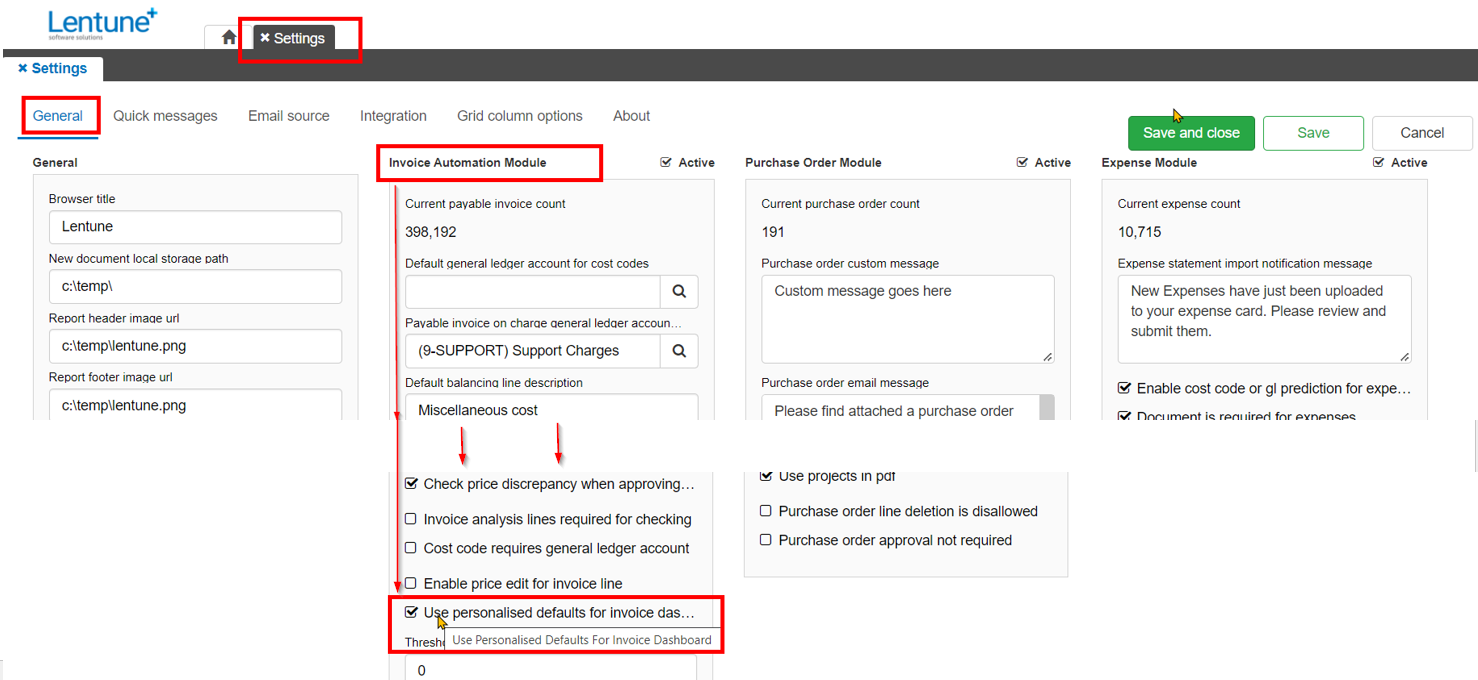
Where you want the Invoice Dashboard defaults to be personalised to the logged in User only, your Administrator should set the flag for Use personalised defaults for invoice dashboard before you set the default selections.
This means that the defaults that any User may set will apply to that User only. This could be useful where different Users might process data for different Branches.
If this flag is not set, then defaults will apply globally to all Users in your system. This means that anyone someone sets a new default, this will apply not just to them but to ALL Users.
To set this flag:
- Go to Administration > Settings.
- Go to the General tab > Invoice Automation Module and scroll to the foot of the page.
- Tick the checkbox Use personalised defaults for invoice dashboard.
- Click Save and Close.

Select Default Branches for Invoice Dashboard
You can set the default search fields for the Invoice Dashboard.
Setting defaults for the Invoice dashboard applies to all selection fields on the dashboard; Transaction Date, Before date, Invoice flags and Branches.
Refer below for a note on the date field if you do not want to save the date in the default settings. It's important to note that if you do set a default date, you won't be able to see any invoices newer than that date.
To select the Branches for which you wish to see invoices for approval:
- Go to Invoice Automation > Invoice Dashboard.
- Branch: Select the Branch you wish to set as the default Branch for invoices to display.

To select multiple Branches:
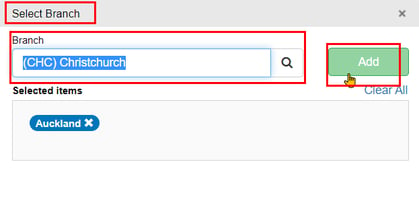
- Click the multi-list icon
 above the Branch field.
- Select the first Branch you want and click Add.
- Repeat for any other branches that you wish to select and click Add.
- Click the X at the top right to exit the Select Branch window.

The selected Branches will now be displayed.
To Save defaults:
- Click Set / Clear default to save your selection.

On the Default for Dashboard screen:
- Clear the Date from the date field.
- Click Save default.

NOTE: The date field will be populated automatically with today's date in the Default for Dashboard window. We do not want to save that date in the default settings.
Therefore if you clear the date field before you save the defaults, then the date will update each day when you come into this screen.
To clear defaults:
- Click Set / Clear defaults.
- Click Clear default.

Need more help? We’re here! We hope our article was helpful! If you need more info or want to connect, drop us an email at support@lentune.com.
Thank you. We love to hear from you!
Last updated: 17 May 2022
